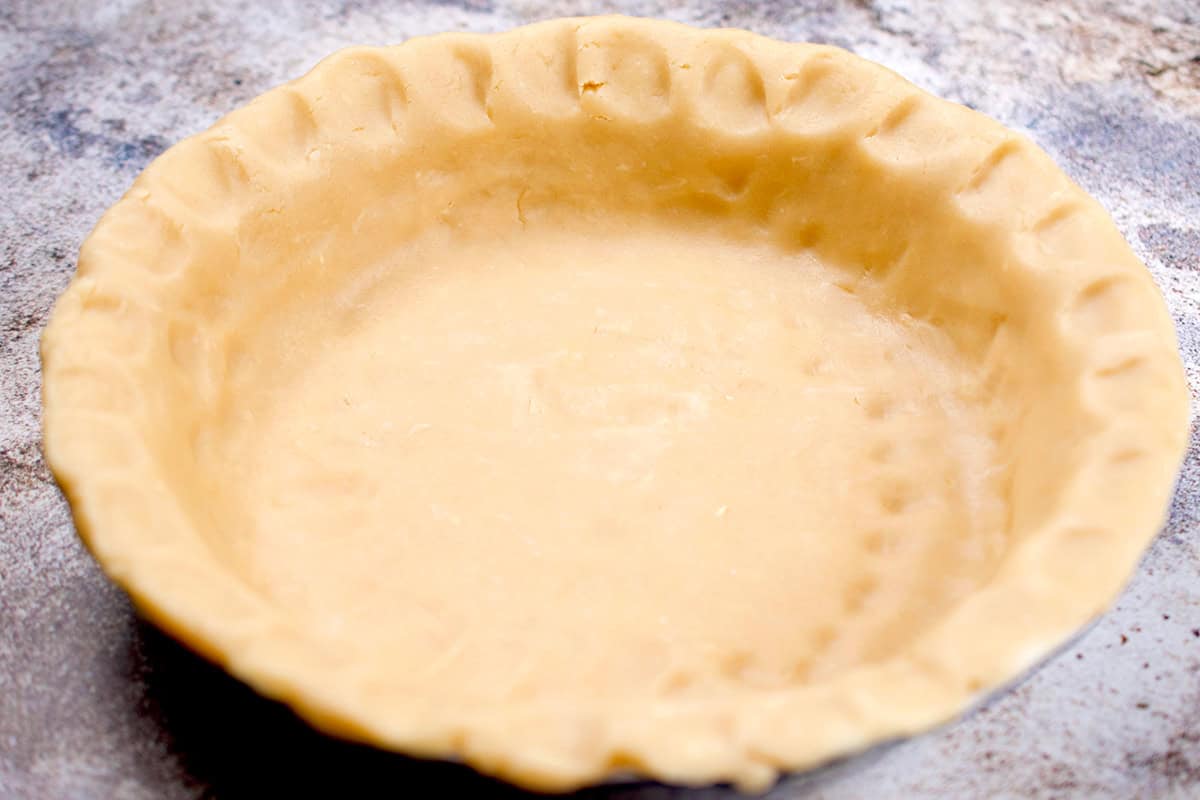
This no-fail Flaky Pie Crust Recipe will elevate all your holiday desserts this season. You can get perfect results every time with three simple steps and five essential ingredients.
WANT TO SAVE THIS RECIPE?
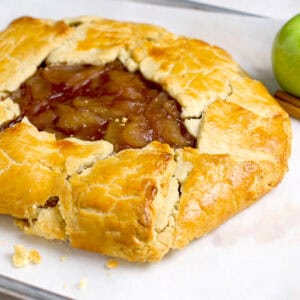
The secret to a perfect pie starts with the crust, and this recipe will show you how easy it is to make one from scratch at home. I love to use this crust to make my annual Thanksgiving pumpkin pie recipe and apple galette recipe, both of which are a must-have at my holiday table.
While I'm no pastry chef, and this pie crust has a rustic appearance, I can honestly promise you the best results in terms of texture and taste with this easy recipe. If you're a fan of pies and tarts, also try my apple frangipane tart recipe for the holidays.
Jump to:
Why you'll love this flaky pie crust recipe
- Easy, no-fuss recipe - This recipe doesn't require an arm workout since it uses a food processor. Since you're not using a pastry cutter or forks, the dough comes together quickly, keeping the butter chilled, which yields a flaky crust.
- Foolproof recipe - I've been making pie crust for years and have tried many methods. This is by far my favorite way to make my dough, as it results in a perfect crust in very little time.
Ingredients for this flaky pie crust recipe
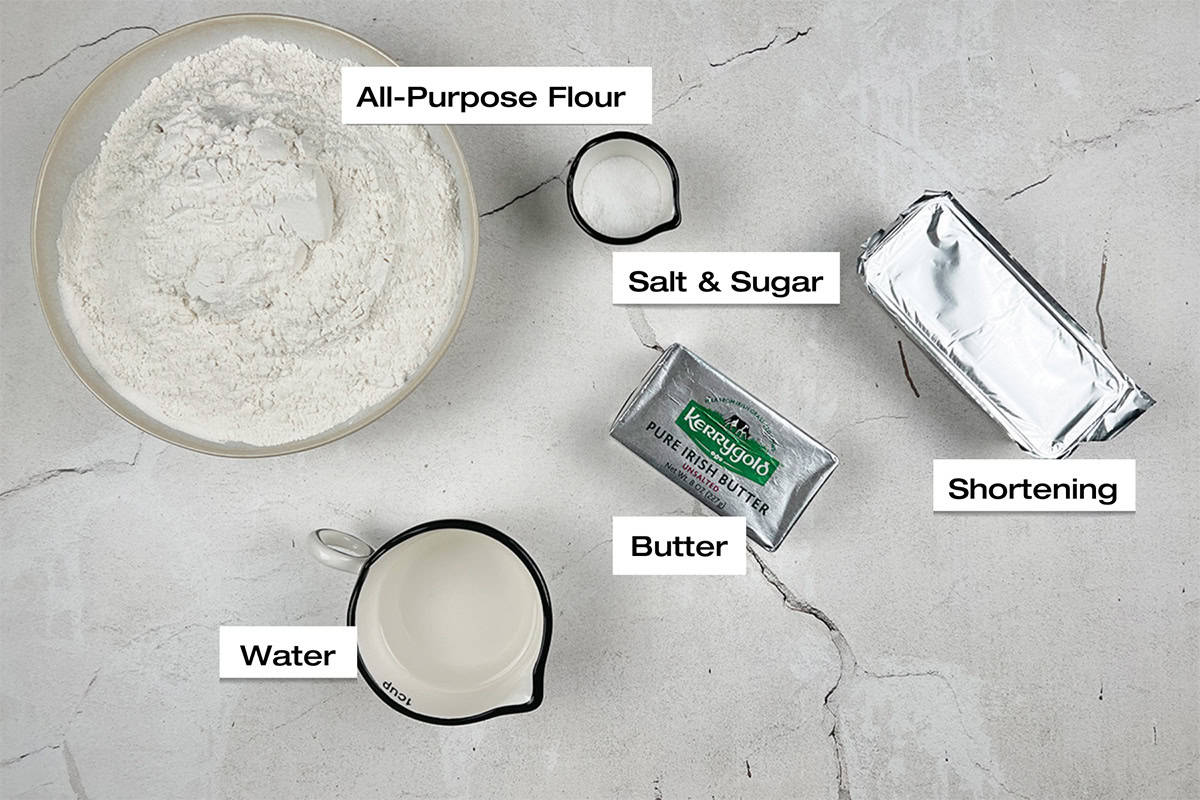
- All-purpose flour - I use all-purpose flour for all my recipes, including my pound cake, nan khatai (Pakistani cardamom shortbread cookies), and orange glazed zucchini bread with dates.
- Butter—For this recipe, it's best to use high-fat content. Here in the USA, that's Kerrygold, which has 82% fat versus the usual 80% found in most other brands.
- Shortening—For a flaky crust, it's best to mix butter and shortening. Shortening has a higher melting point than butter, resulting in the flakiness we all desire. Most pie-baking experts recommend using equal amounts of the two when making a crust.
- Salt & sugar - A small amount of salt and sugar adds a balanced flavor to the crust.
Please see the recipe card at the bottom of this post for the complete list of ingredients, measurements, and recipe instructions.
Substitutions & variations
- Make it in a stand mixer - This recipe can also be made in a KitchenAid or any other stand mixer, using a paddle or pastry attachment.
- Use a pastry cutter - Make the dough the old-fashioned way, using a pastry cutter (instructions in the recipe card).
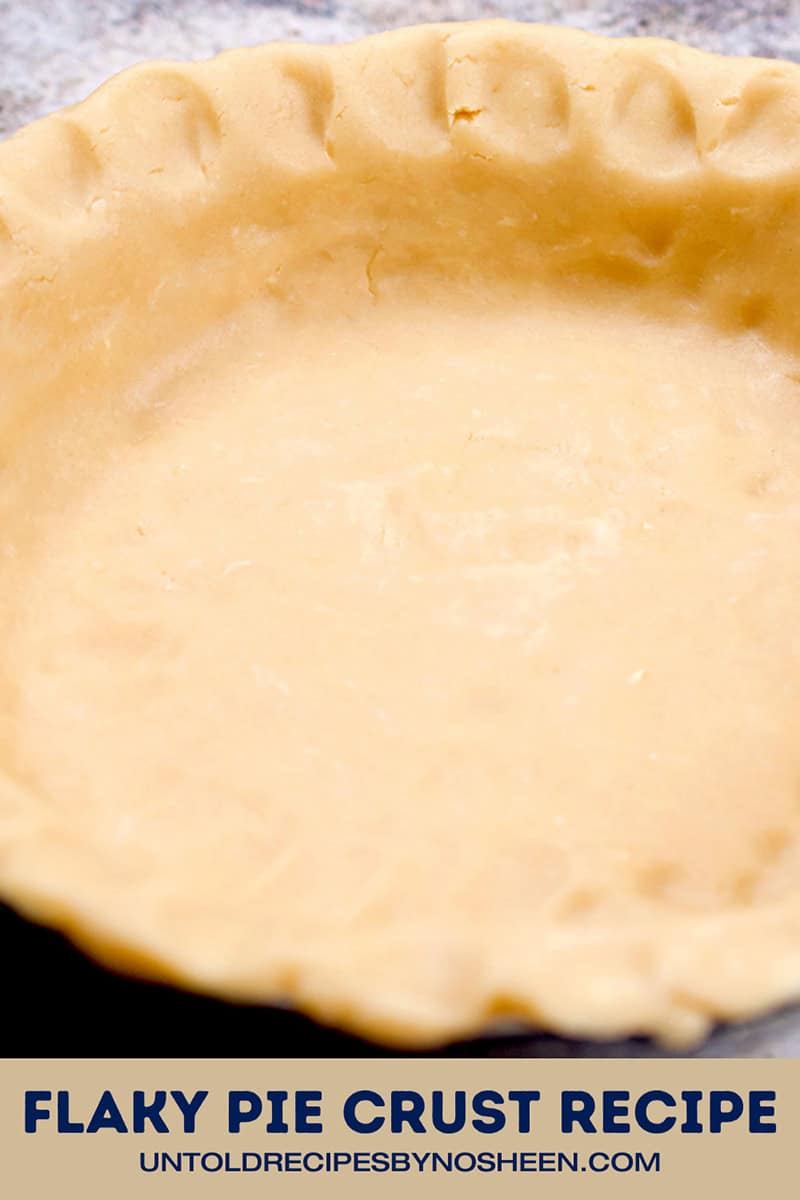
- Crimp with a fork - Crimp the edges with a fork for a more uniform and elegant design.
- Glaze the rim - Use an egg and cream mixture to create a pretty glaze for the pie crust edge. One egg yolk and two tablespoons of heavy whipping cream should be enough for a 9-inch crust.
How to make this flaky pie crust recipe
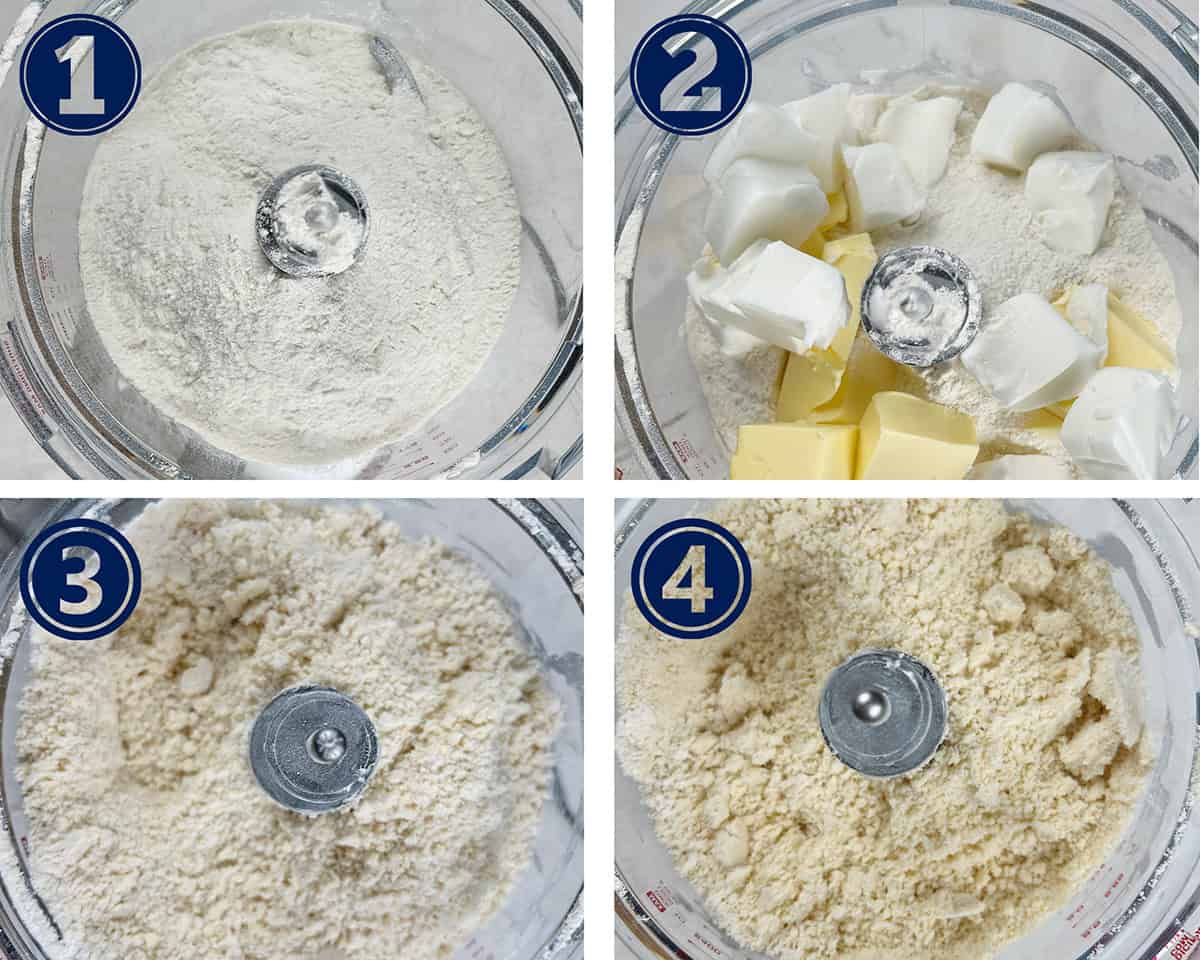
- First step - Add the flour, salt, and sugar to your food processor and pulse to mix.
- Second step - Cut the butter and shortening, and add them to the flour.
- Third step - Pulse 3-4 times, uncover, and stir to mix.
- Fourth step - Pulse another 2-4 times until the mixture has a sandy texture.
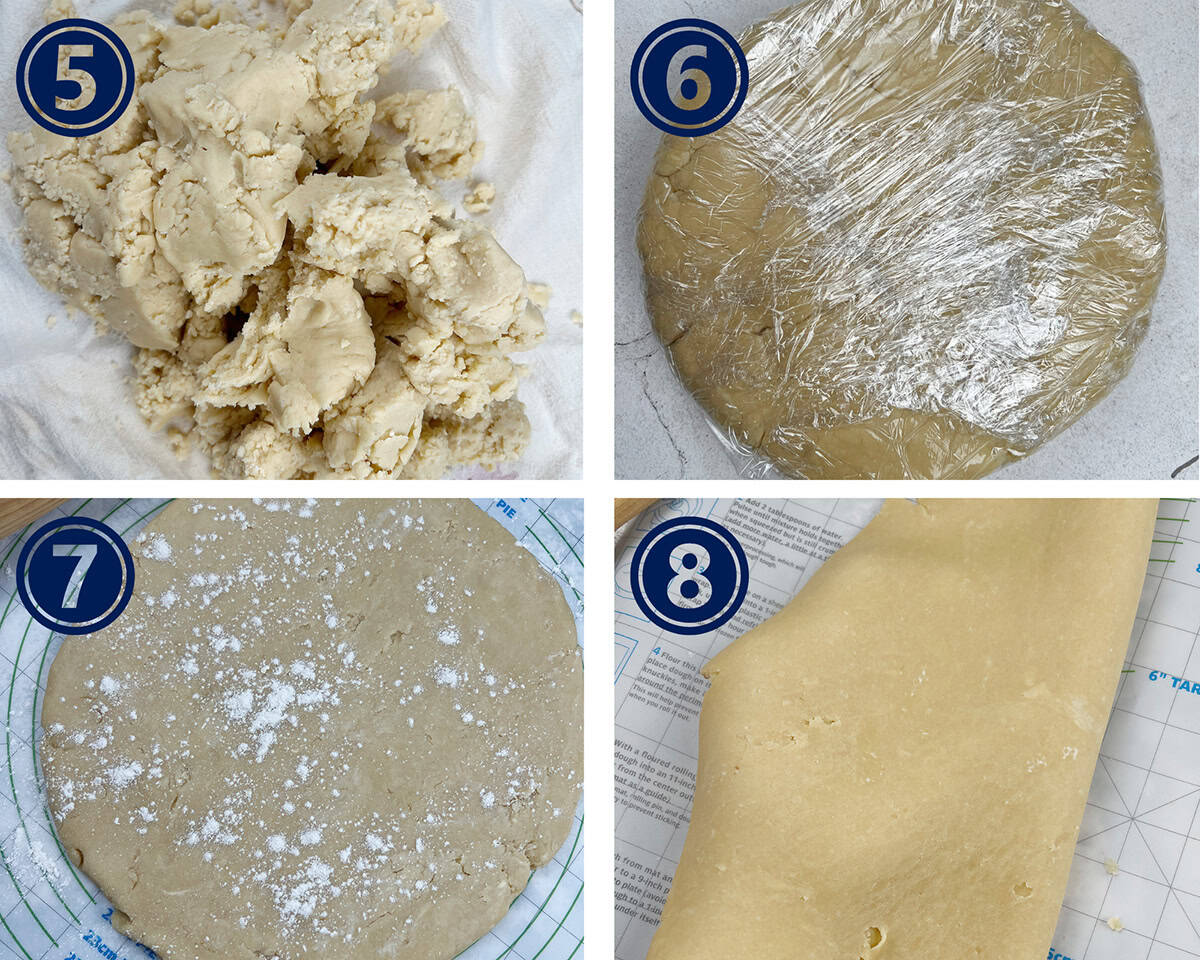
- Fifth step - Add the water, a little at a time, until the dough comes together. Place it on a clean kitchen towel and shape it into a disc.
- Sixth step - Wrap the dough in two layers of plastic wrap and chill for an hour.
- Seventh step - Remove the chilled dough, place it on a floured surface, and roll it into a 12-inch circle.
- Eighth step - Gently place in an oven-proof pie plate, crimp, and bake as per instructions for your pie recipe.
Expert Tips
- Chill the fats - A crucial element of a flaky crust is keeping the fats chilled. If the fat melts and is absorbed into the crust, gluten is released, and the resulting crust will be hard.
- Use ice water - For perfect results, use ice water so the fat doesn't melt.
- Chill the pie pan - This is especially important when doing a blind bake to prevent shrinkage during the baking process. I like to roll out and place the crust in my pie dish and chill it in the refrigerator for 20-30 minutes before baking it.
- Don't overmix the dough - Overmixing the dough will release gluten, resulting in a tough and dense crust.
- Shape the dough into a disc - This helps roll it out more efficiently than chilling it in the shape of a ball.
- Bake on the lower rack - This is closest to the heating element and will produce a less soggy base.
Recipe FAQS
The usual reason for a tough pie crust is not enough fat or too much water. Measure the ingredients accurately and add the water 1-2 tablespoons at a time. Stop adding water as soon as the dough comes together.
Keep some chilled water nearby when rolling the pie crust, and seal any cracks that form with wet fingers.
A pie crust made with a combination of these two fats yields better results than using either alone. Butter lends the crust its delicious flavor, brown color, and less crumbly texture. Shortening, however, has a higher melting point and gives the crust its flaky texture and structure.
Freshly prepared pie dough can be Double-wrapped in plastic wrap and stored in the refrigerator for up to 2 days and in the freezer for up to 3 months. Defrost in the fridge overnight and roll out as needed.

Other holiday recipes you may like
For more Pakistani recipes like this, check out 20 popular Pakistani recipes. If you decide to try this recipe, Please don't forget to leave a rating and comment below! If you take a picture, tag me on Instagram! Thank You!
Flaky Pie Crust Recipe
WANT TO SAVE THIS RECIPE?
Ingredients
- 2½ cups all purpose flour
- ½ teaspoon salt
- ½ teaspoon sugar
- ½ cup unsalted butter
- ½ cup shortening
- ½ cup ice water
Instructions
- Measure all your dry ingredients in the bowl of your food processor and pulse to mix.
- Cut the butter and shortening into pieces and add to the food processor. Pulse about 6-8 times until you have a crumbly mixture. (see notes)
- Add the chilled water to this mixture and pulse about 4-6 times till the mixture is just blended (see notes)
- Place the mixture in a clean dish towel and gently press into the shape of a disc. (see notes)
- Wrap the dough in plastic wrap and place in the refrigerator to chill.
- After 1 hour, remove the dough and flatten it gently on a floured work surface.
- Start rolling out the dough till you have a round shape about 2 inches larger than the base of your pie pan. (see notes)
- Gently transfer to your pan and remove the excess dough that is hanging. (see notes)
- Crimp the edges as desired and then bake per instructions for your specific pie. (see notes)
Notes
- Butter and shortening—Ensure the butter and shortening are chilled and cut into pieces; don't overmix them with flour. You should have a slightly crumbly mixture with pieces of fat still visible.
- Water—The water must also be chilled, and it is best to add 1-2 tablespoons at a time. When the dough comes together, stop adding the water, as it can make the pie crust dense.
- Blend the butter—Use your pastry cutter to Blend the fats with the dry ingredients. This step is crucial. The butter and shortening must be well chilled, and it's best to avoid using your hands at this point so the dough doesn't get warm. If you don't have a pastry cutter, use two forks instead. Mix these ingredients until you have approximately pea-sized particles.
- Add the water - Add 1-2 tablespoons of the chilled water at a time, and gently start putting the dough together to form a ball. This step is also crucial, as no kneading should be done. When you have nicely bound disc-shaped dough, wrap it in plastic wrap and refrigerate it for at least one hour.





Bushra Irfan
This pie crust is good for both sweet and savory(Quiche) (after omitting sugar) pies and tarts?
untoldrecipesbynosheen
Yes Bushra you can use it for both sweet and
Savory fillings